Pin-type Single Color LED
Updated: 6/28/2025 Words: 0 words Reading time: 0 minutes
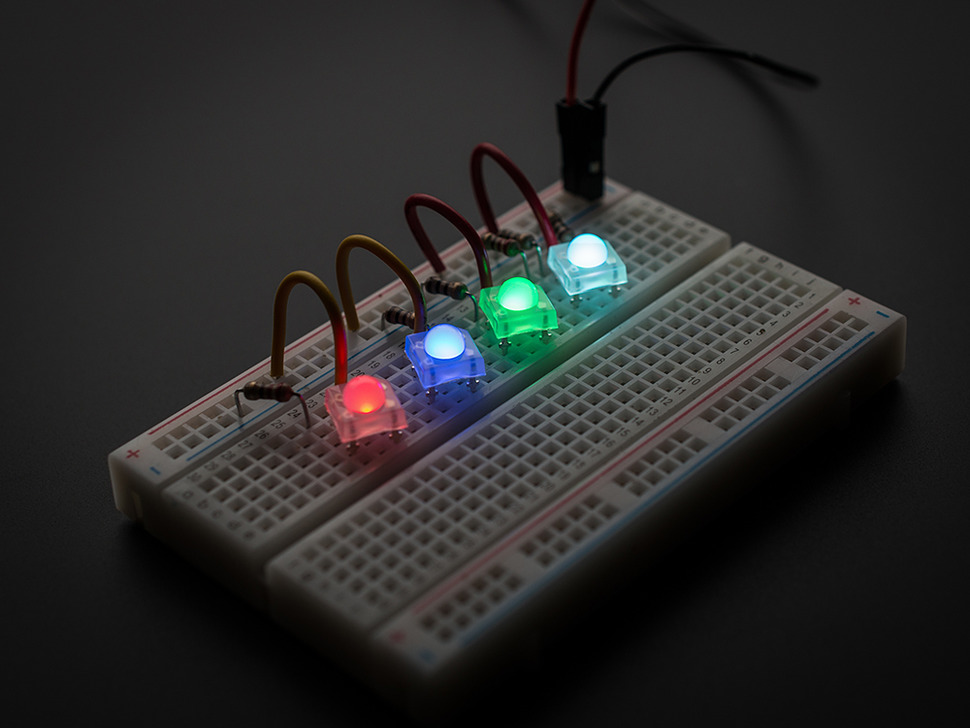
Pin-type single color LED is a light-emitting diode with two pins that can emit light of a single color. You can use the Creative Box to control various different colored single color LEDs.
Through single color LEDs, you can achieve decorative lighting, electronic toys, indicator lights and other creative projects.
Preparation
Hardware
| Hardware | Description | Image |
|---|---|---|
| Creative Box Platform | 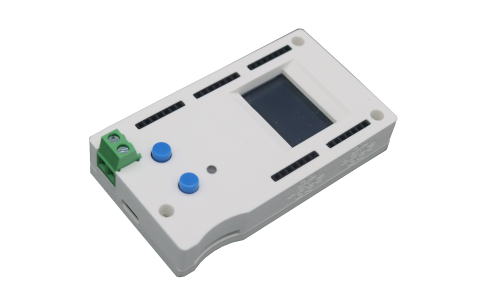 | |
| Power Signal Module | Included with Creative Box purchase |  |
According to your needs, you can choose from the recommended single color LED list below
| Hardware | Description |
|---|---|
| Single Color LED | Available on Taobao, Purchase Link. You can choose any voltage range from 3V to 20V. You can select different output voltages at the Creative Box terminal block. Higher voltage means higher LED brightness. |
| Waterproof LED | Taobao Purchase Link. Choose any 12V voltage option. |
| Billboard LED | Taobao Purchase Link |
If you need to output voltage higher than 5V at the terminal block through TypeC PD protocol, please use a power source that supports USB TypeC. Recommended:
| Hardware | Description |
|---|---|
| USB TypeC PD Power Source | Purchase Link. |
| USB TypeC PD Power Source | Purchase Link. |
Software
| Software | Description |
|---|---|
| Power Control Application | Official frontend application, can be directly loaded and used through the console. |
Video Tutorial
Single Color LED Light
Power Signal Module
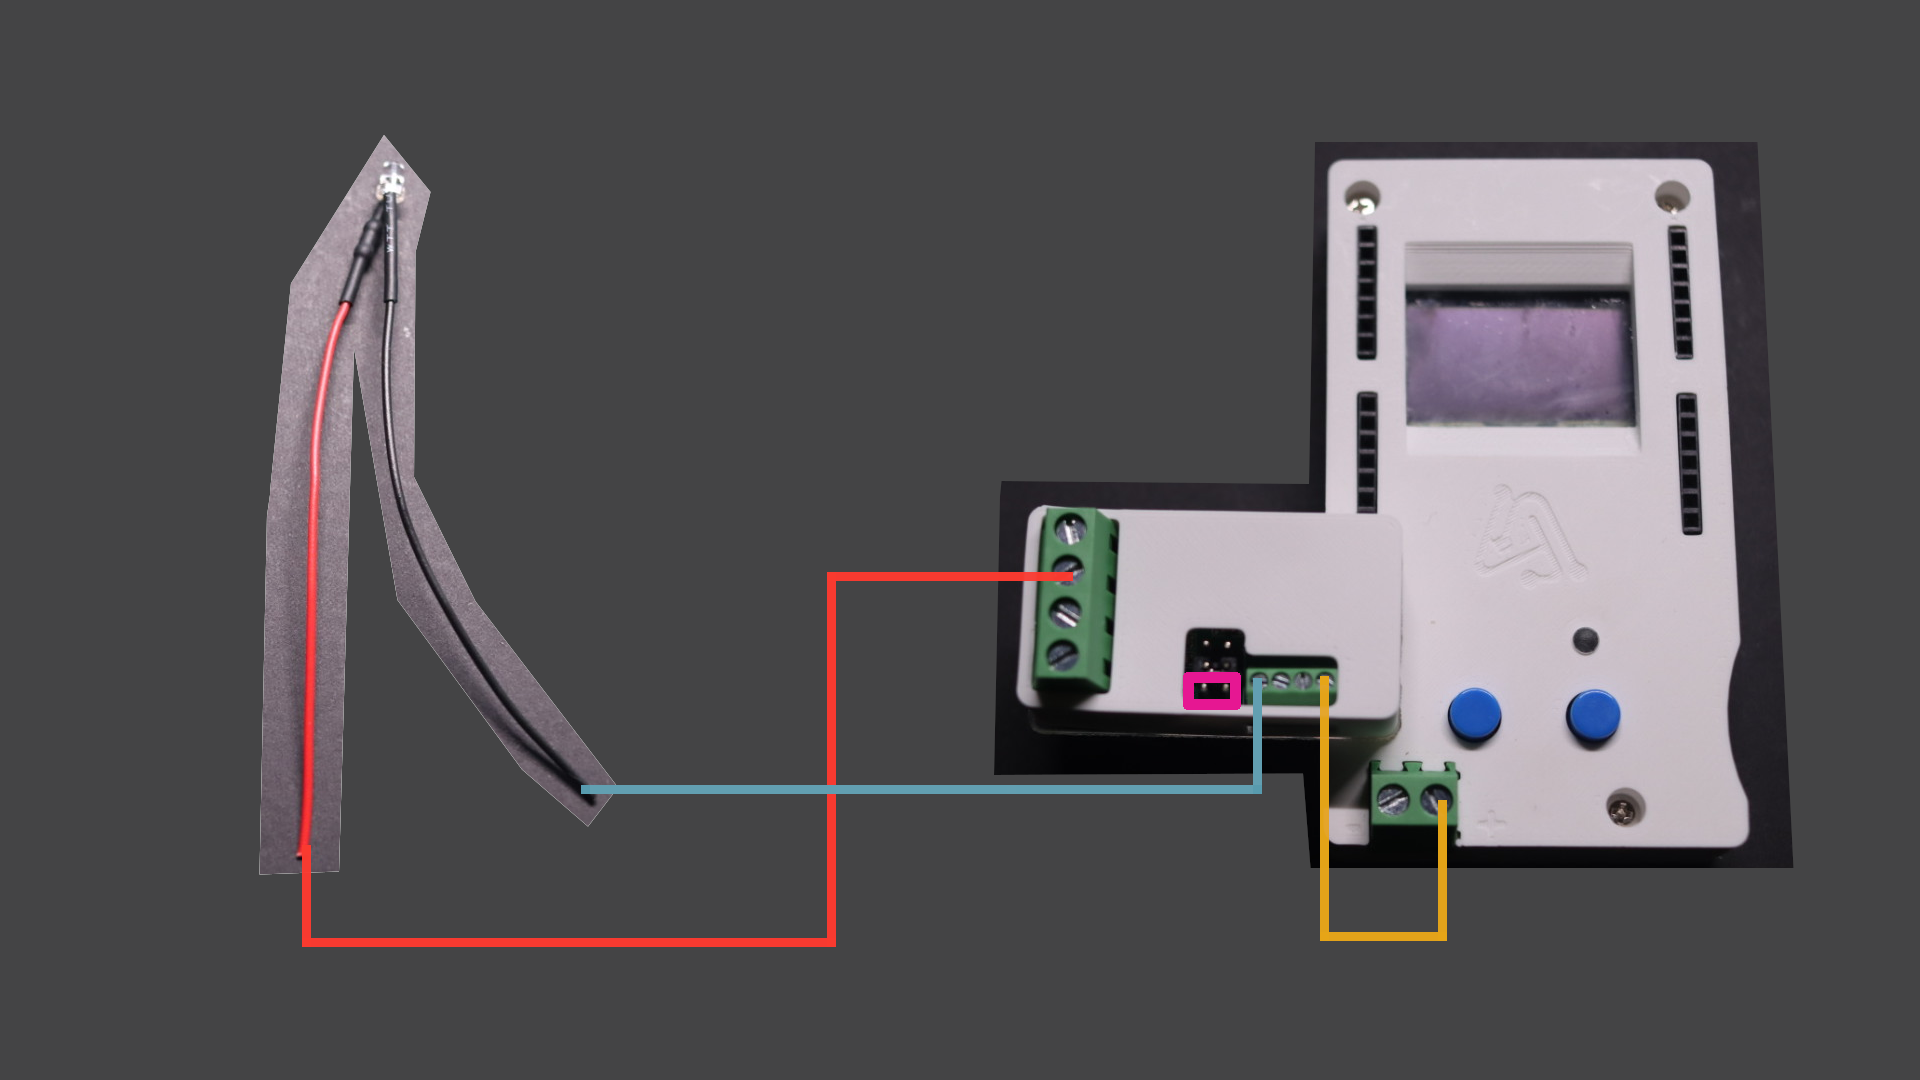
Connection
| Connection |
|---|
| Insert the power signal module into any header on the Creative Box, the diagram shows platform pins 8-11 |
| ▀ Connect the positive terminal of the single color LED to the power output port of the power signal module |
| ▀ Connect the negative terminal of the single color LED to the ground of the power signal module |
| ▀ If your single color LED requires voltage higher than 5V, connect the platform terminal output positive to the terminal input port of the power signal module |
| ▀ If your single color LED requires voltage higher than 5V, adjust the jumper cap to the terminal input position |
Usage
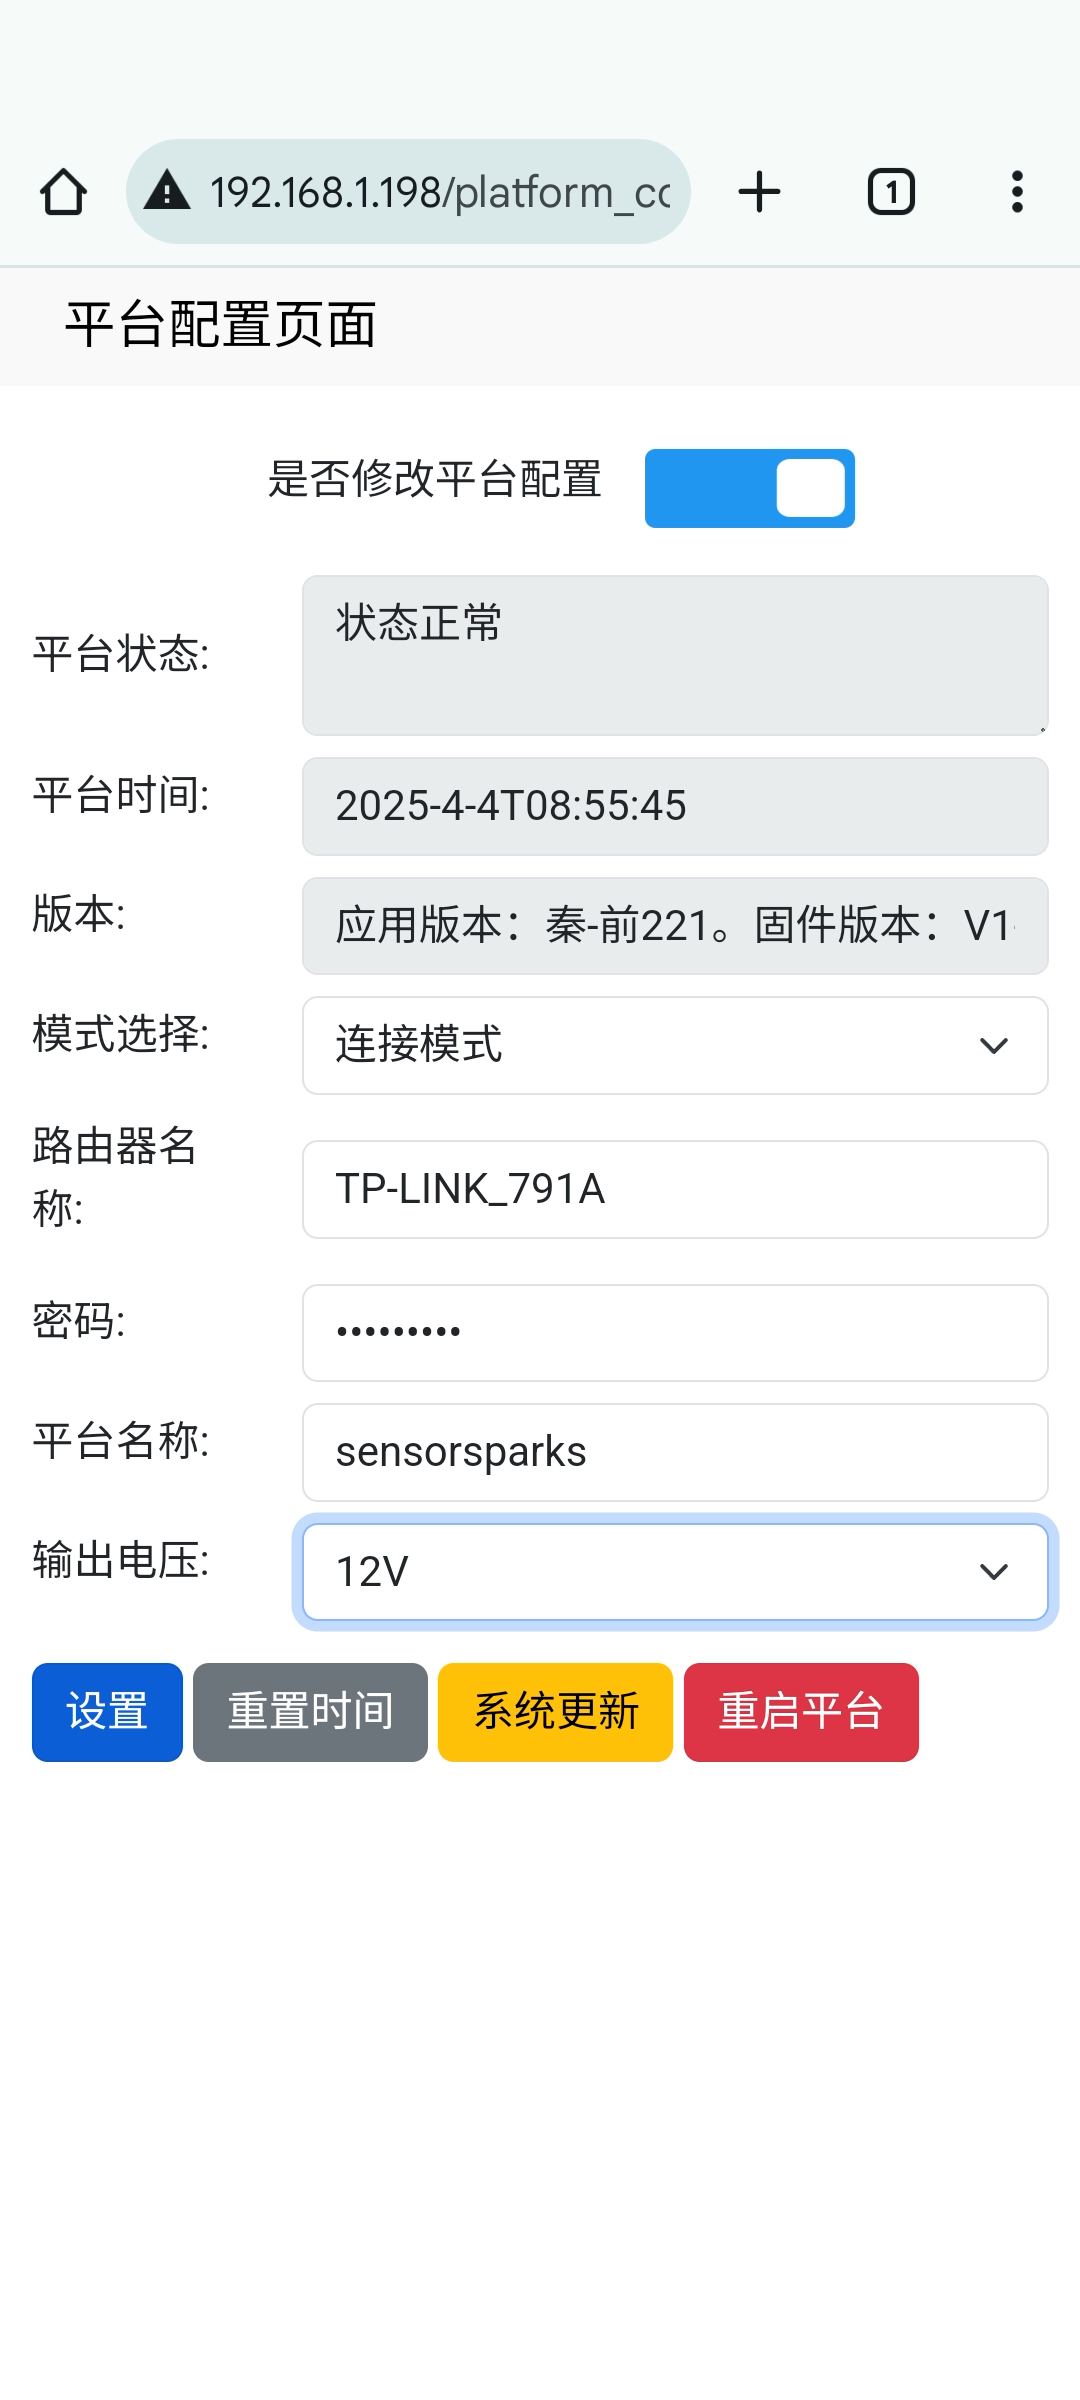
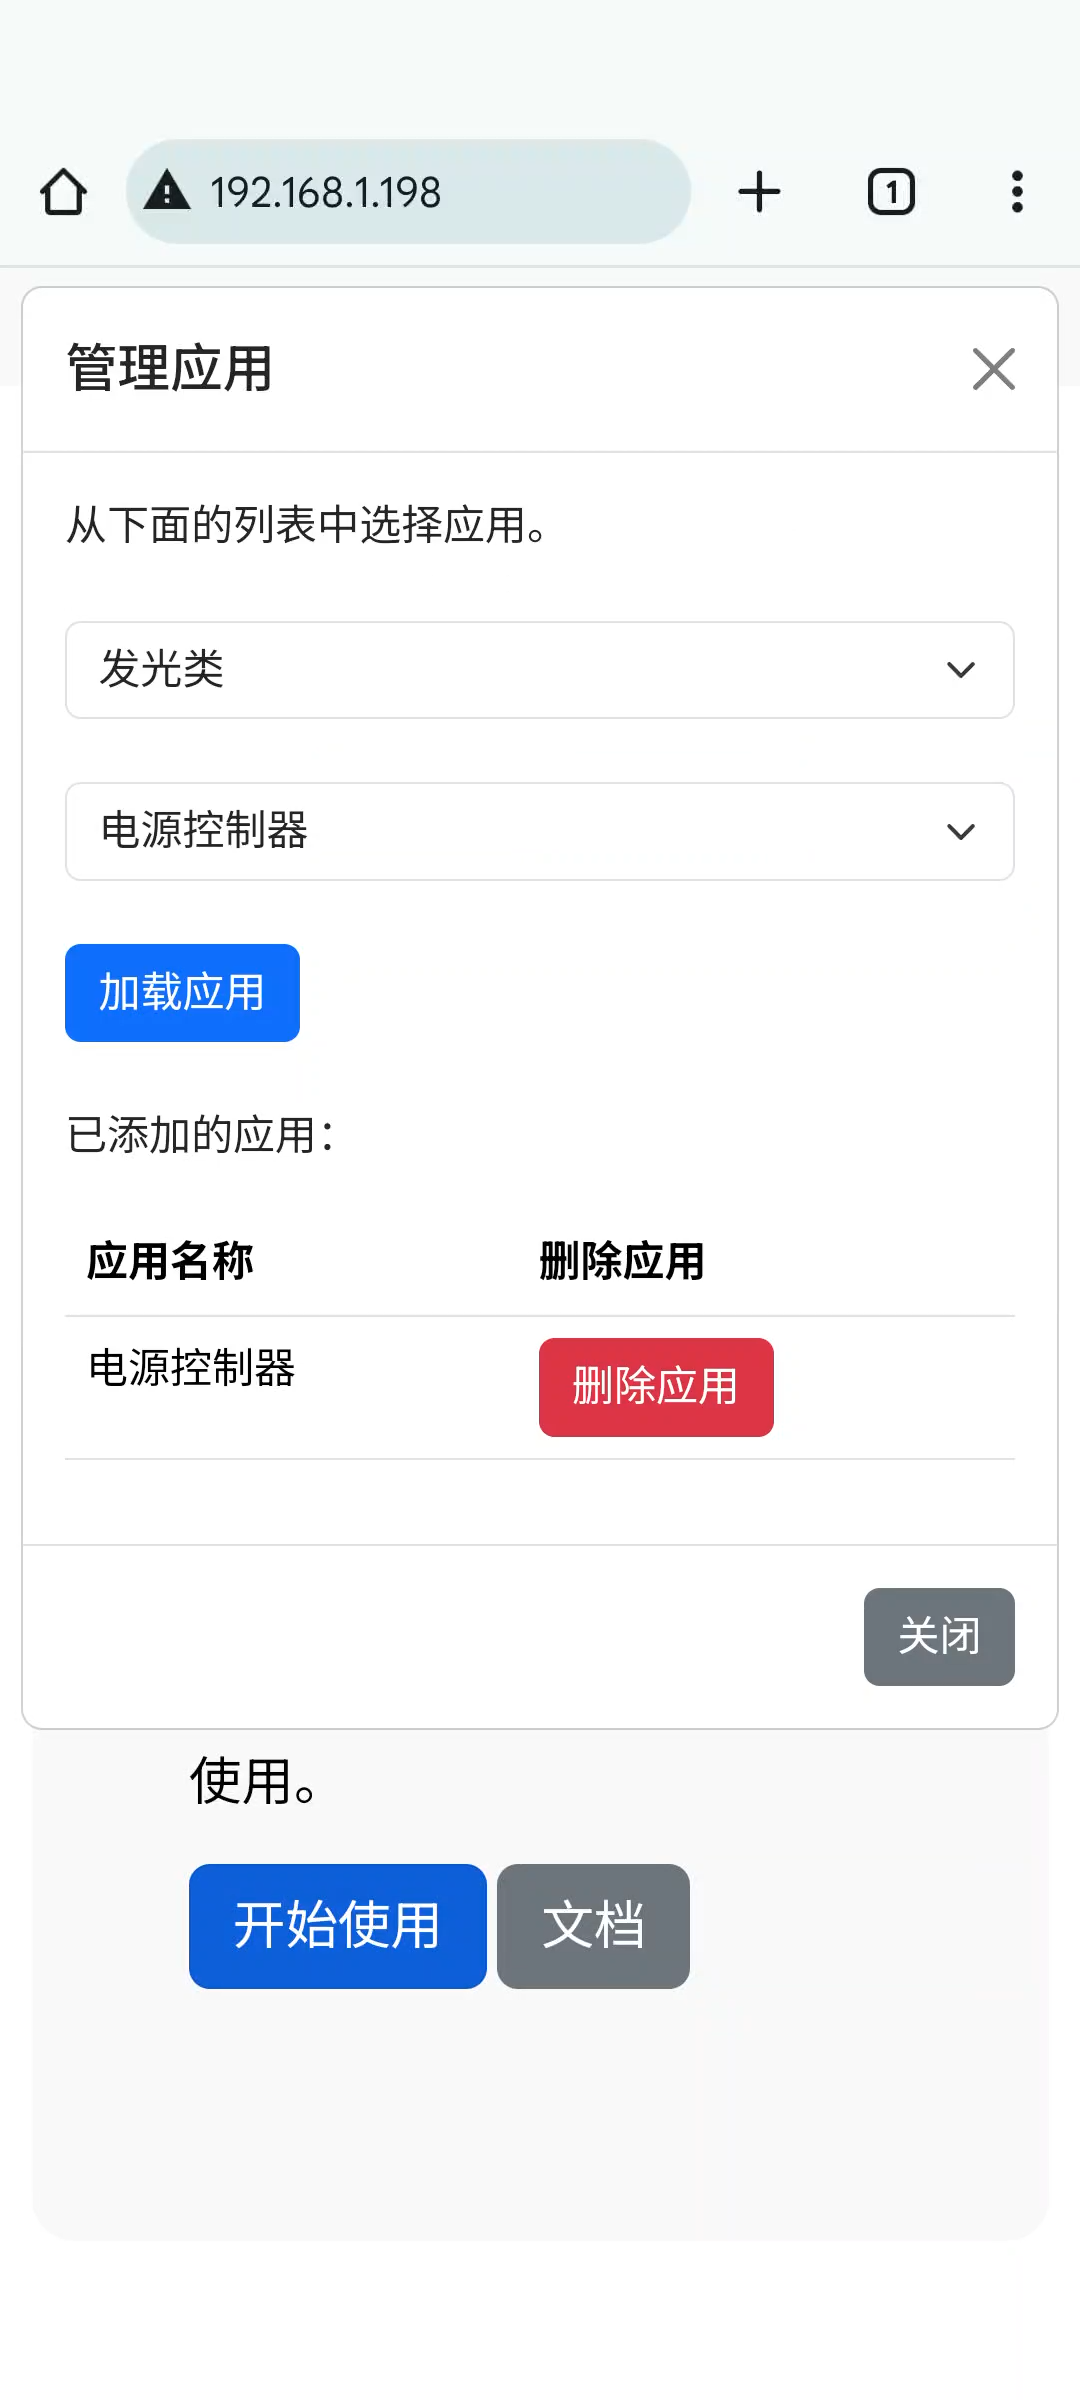
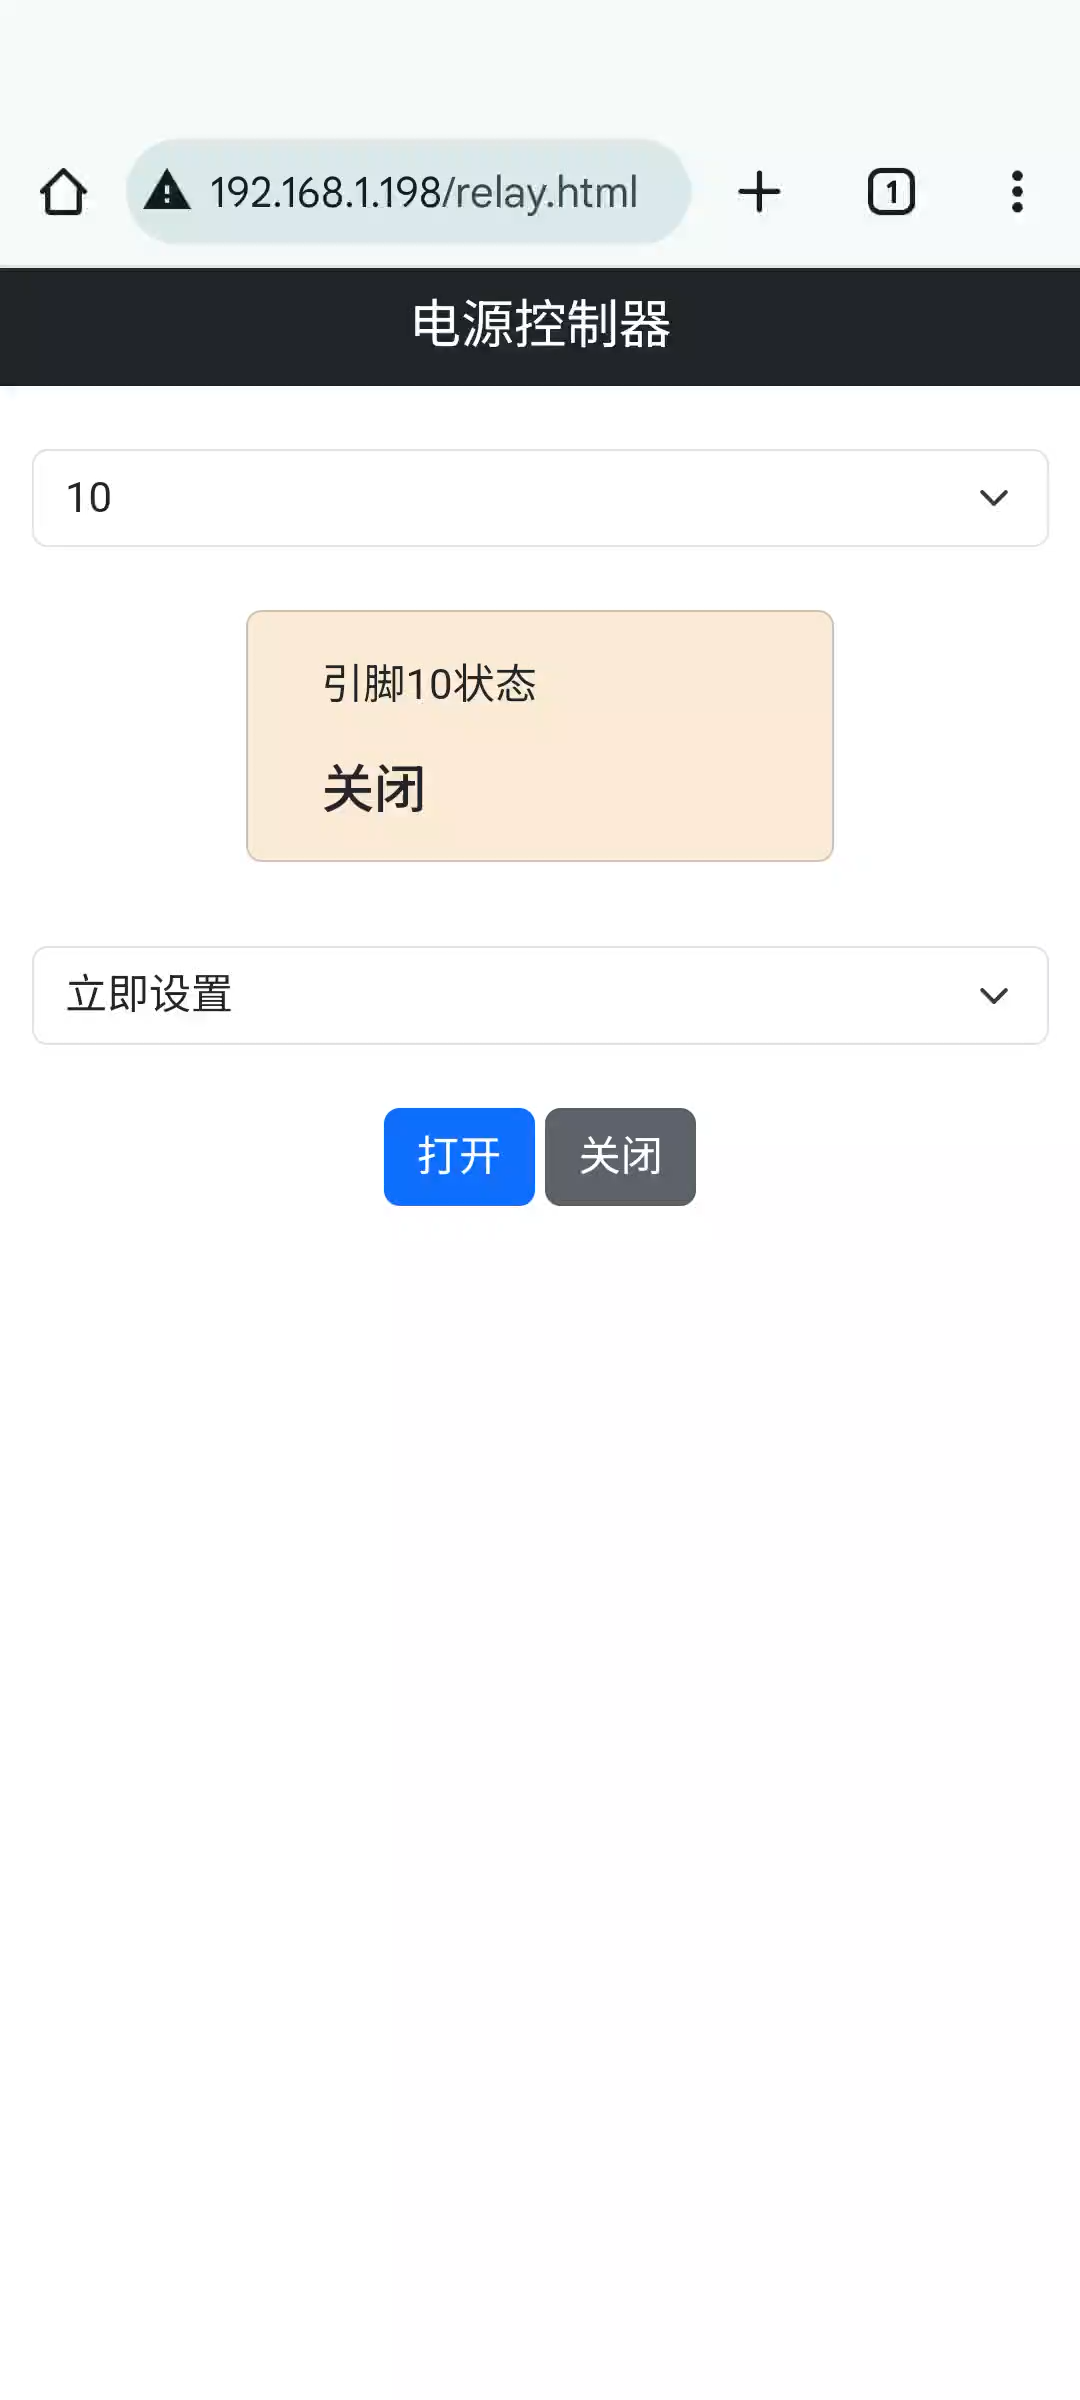
Open the Creative Box console and load the Power Controller application from the lighting applications. Enter the application, select the pin number where the Creative Box connects to the power output. Click open or close to control the single color LED.
| Creative Box Console | Set Output Voltage | Load Application | Select Pin Number and Control |
|---|---|---|---|
 |  |  |  |
Principle
Forward Voltage
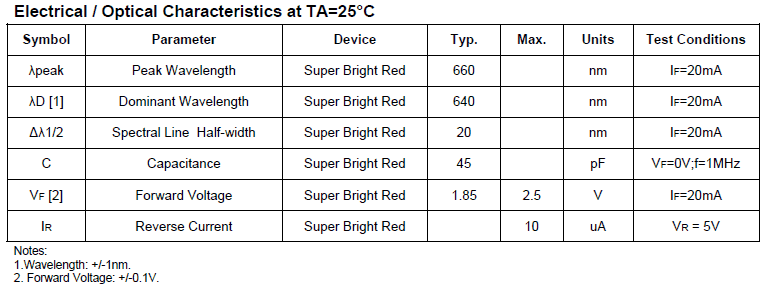
For each LED, to use it correctly, we need to understand the forward voltage. What is forward voltage? Let's explain through a photo:
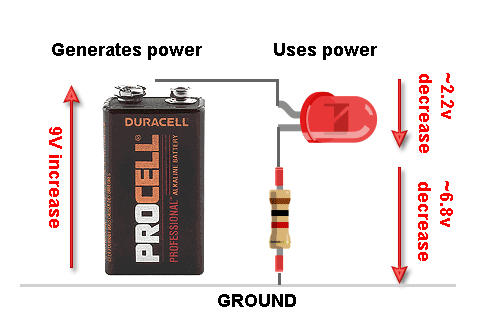
In the circuit above, there is a battery (generating voltage) and resistor + LED (consuming voltage). The resistor and LED together need to absorb 9 volts. Assuming the LED's forward voltage is 2.2V, then the resistor needs to absorb the remaining 6.8V. If this resistor has a resistance of 1000 ohms, then the current through the resistor is 6.8 volts/1000 ohms = 6.8 milliamps (Ohm's law).
The resistor current is 6.8 milliamps, and this current also flows through the LED, so the LED current is 6.8 milliamps. The current through the LED (I) is proportional to the LED's brightness. If you increase the current, the LED will be brighter. Similarly, if you decrease the current, the LED will be dimmer.
However, excessive current will damage the LED. So, how much current should we use for optimal performance? For some very large "high-power LEDs," the current might be as high as 1 or 2 amperes, but for almost all 3mm, 5mm, or 10mm LEDs, the appropriate current amount is 20 milliamps. The datasheet mentioned earlier can verify this. The rightmost column, IF represents forward current (I), and they use 20 milliamps.